How to Make Apple Cider Vinegar: A Practical Guide for Home Enthusiasts in 2025
How to Make Apple Cider Vinegar: A Practical Guide for Home Enthusiasts in 2025
Apple cider vinegar is a versatile ingredient with numerous benefits, from enhancing culinary creations to aiding in health remedies. Making your own **apple cider vinegar** at home is not only rewarding but also allows you to control the quality of ingredients, ensuring a pure, **natural apple cider vinegar** free from additives. This practical guide will help you navigate the exciting world of homemade apple cider vinegar, covering everything from the **vinegar fermentation process** to tips for enhancing the flavor profile of your homemade creations.
Understanding the Vinegar Fermentation Process
At its core, the process of making **homemade apple cider vinegar** involves two stages: alcoholic fermentation and acetic acid fermentation. During the first stage, the natural sugars found in apples are converted into alcohol by yeasts. The second stage sees bacteria convert the alcohol into acetic acid, giving vinegar its distinct tangy flavor. A solid grasp of the **vinegar fermentation process** is essential for anyone wishing to craft high-quality vinegar from apple scraps.
Choosing the Best Apples for Vinegar
The success of your homemade vinegar depends largely on the type of apples you select. Look for **best apples for vinegar** varieties that are rich in sugar, aromatic, and offer a good balance of acidity and sweetness. Varieties such as Granny Smith, Honeycrisp, or even cider-specific types like Kingston Black are ideal. Furthermore, using **apple scraps**—cores and peels—can significantly reduce waste and enhance your vinegar’s flavor profile. Pinching the ingredients for your **apple cider vinegar** not only helps save costs but also is an environmentally friendly practice.
Gathering Ingredients for Your Apple Cider Vinegar Recipe
Before embarking on your journey to make **apple cider vinegar from scratch**, gather your ingredients. You’ll need a few pounds of good quality apples or **apple scraps**, water, and sugar. A tablespoon of sugar helps accelerate fermentation, especially if you’re using sweeter apple varieties. For those who prefer a cleaner and quicker batch, consider using **vinegar mother**, which contains acetic acid bacteria essential for fermentation. Ensuring you start with high-quality, organic apples will lead to the best results and a rich flavor in your final product.
Fermentation Vessels and Preparation
Choosing the correct fermentation vessel is crucial in the **apple cider fermentation** process. Glass jars are preferred due to their non-porous nature, which minimizes contamination. Additionally, equip yourself with cheesecloth or a clean kitchen towel to cover the jar, allowing airflow while keeping out dust and insects. Make sure to sterilize these vessels properly to avoid spoilage and maintain a healthy environment for fermentation. The appropriate **fermentation temperature for vinegar** can significantly impact the outcome; aim for a location that maintains a consistent range between 60°F and 80°F. This encourages optimal fermentation.
The Step-by-Step Process of Making Apple Cider Vinegar
Once you’ve gathered all your ingredients and chosen the correct vessels, you’re ready to dive into the step-by-step production of your **homemade apple cider vinegar**. The following straightforward process simplifies how to turn those apples into a tangy, homemade delight.
Step 1: Preparing Your Apples
Start by washing your apples thoroughly to remove any chemicals or pesticides. If you’re using **apple scraps**, ensure they are clean and free from mold. Chop the apples into pieces, leaving the skins on to maximize flavor and nutrient content. Place your apple pieces into a large sterilized glass jar, filling it to about halfway. This ensures enough space for the fermentation gases to escape during the process.
Step 2: Adding Water and Sugar
Next, dissolve a cup of sugar in a quart of water. This sugary water will provide the necessary nutrients for the yeast during the fermentation process. Pour this mixture over the apples until they are completely submerged. If you’re using **using sugar to ferment**, be mindful that this step may impact the **vinegar pH levels** in your final product, so adjust sugar quantities according to your taste preferences. Cover the jar loosely with a cheesecloth or an airy towel, securing it with a rubber band to allow air to circulate.
Step 3: Waiting and Watching
After preparing your mixture, set the jar in a warm, dark place and allow it to sit undisturbed for about 3 to 4 weeks. This period is crucial for the **alcoholic fermentation** to occur. Depending on your environment and selected apple variety, you may need to stir the mixture weekly to encourage even fermentation. Keeping an eye on the bubbles and aroma will signal that fermentation is underway. **How long to ferment apple cider vinegar** can vary, but once the smell becomes less sweet and more vinegary, it’s time for the next stage.
Step 4: Introducing the Bacteria
Once the initial fermentation phase is complete, it’s time to introduce the acetobacter bacteria, which convert the alcohol into acetic acid. You can do this by adding a little store-bought vinegar (ensure it’s raw and unfiltered) or existing **vinegar mother** to the mixture. Cover it again and let it ferment for an additional 4 to 6 weeks. Taste your ****apple cider vinegar recipe**** regularly to monitor its development. Once you reach your desired acidity, you can prepare it for storage.
Storing and Using Homemade Apple Cider Vinegar
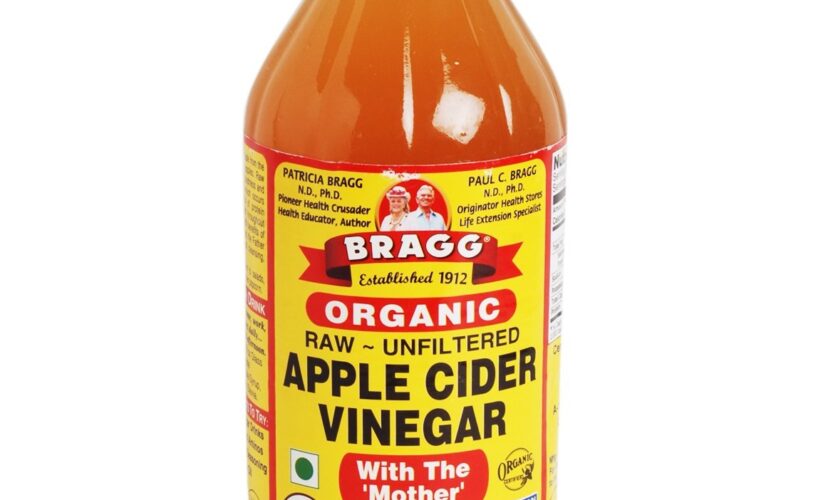
Once your vinegar has reached the desired potency, it’s essential to transfer it to a proper storage solution. Learn about ideal methods for keeping your **raw apple cider vinegar** fresh and flavorful.
Bottling Your Homemade Vinegar
For storage, use sterilized glass bottles with tight-fitting lids. **Storing apple cider vinegar** requires a cool, dark space, and it is not necessary to refrigerate it. Ensure you leave a little space at the top of the bottles to allow for any gas expansion. If you notice a **vinegar mother** forming, don’t discard it; it’s a sign of healthy vinegar and can be reused for future batches.
Health Benefits of Apple Cider Vinegar
Homemade **apple cider vinegar** offers numerous health benefits. From aiding in digestion and helping with blood sugar levels to offering antioxidant properties, it serves as a powerful natural remedy in various **DIY apple projects**. You can enjoy it straight, use it in salad dressings, or even as part of your daily detox regimen. Having a bottle of homemade **apple cider vinegar detox** on hand can enhance your culinary and health journey.
Creative Uses for Your Apple Cider Vinegar
Beyond health benefits, **apple cider vinegar uses** in culinary settings are endless. Incorporate it into marinades, salad dressings, or even as a natural preservative for fruits. The **cider vinegar flavor** adds a delightful tang to various recipes. Consider experimenting with flavors by adding herbs or spices during the fermentation stage for unique taste profiles. Creating infusions also yields exciting **vinegar recipes for cooking**, elevating everyday meals into gourmet experiences.
Key Takeaways
- Select high-quality apples to craft flavorful **apple cider vinegar**.
- Understand the two-phase fermentation process for optimum results.
- Monitor acidity and flavors throughout fermentation to achieve the desired taste.
- Store your **homemade apple cider vinegar** in glass bottles for longevity.
- Explore creative **vinegar recipes** to incorporate into your cooking and health routines.
FAQ
1. What is the vinegar mother, and how can I make one?
The **vinegar mother** is a gelatinous substance that forms during the fermentation of vinegar, consisting of acetic acid bacteria and cellulose. You can create one by allowing unpasteurized vinegar to sit in a warm environment, exposing it to air. Once it’s formed, you can use it in subsequent batches to jumpstart the fermentation process.
2. Can I speed up vinegar fermentation?
Yes, you can accelerate the vinegar fermentation process by adding sugar, maintaining warm temperatures, and ensuring good air circulation over your mixture. Mixing in an existing **vinegar mother** can also tremendously speed things up while providing the necessary bacteria for fermentation.
3. What types of apples are best for making vinegar?
Choosing apples with high sugar and acidity levels will yield the best **apple cider vinegar**. Varieties such as Granny Smith, Fuji, or special cider apples like Kingston Black work exceptionally well for creating rich-flavored vinegar.
4. How should I store my homemade vinegar?
Store your **homemade apple cider vinegar** in dark glass bottles with airtight lids in a cool, dark pantry. Properly bottled vinegar can last indefinitely due to its acidic nature. However, for the best flavor, consume it within a year.
5. What are the benefits of using apple cider vinegar in my daily health routine?
Using **apple cider vinegar** in your daily routine can provide numerous health benefits, including improved digestion, balanced blood sugar, and potential weight loss support. Additionally, its antimicrobial properties may help in maintaining healthy skin and reducing cholesterol levels.
6. Is there a difference between pasteurized and raw apple cider vinegar?
Yes, raw apple cider vinegar is unfiltered and unpasteurized, preserving its natural probiotics and beneficial compounds, while pasteurized vinegar is heated to kill bacteria, which also removes some health properties. For health benefits, choose raw **apple cider vinegar**.
7. How can I use apple cider vinegar in my cooking?
Apple cider vinegar can be used in various culinary applications such as in marinades, salad dressings, sauces, and even baking. Its **cider vinegar flavor** enhances dishes, while its acidity can tenderize meats and add depth to flavors.